Removing
1. Disconnect the negative battery cable.
2. Disconnect the speedometer drive cable, reversing light switch and (where installed) the switch of a control lamp of a choice of 5th transfer.
3. Remove the mounting bolts from the clutch cable bracket and disconnect the cable from the release lever.
4. Remove the ground strap mounting bolt and harness bracket.
5. Remove the starter (Section 5).
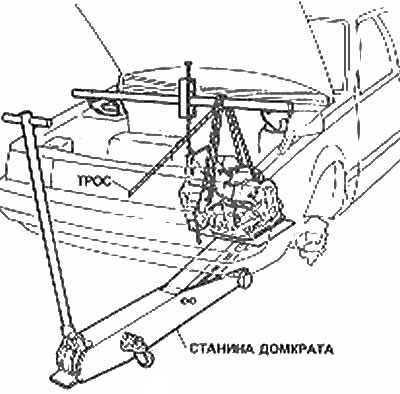
6. There are two ways to support the weight of the engine during the removal of the crossmember and transmission: using a special bed resting on the upper supports of the suspension struts, or using a winch. If a bed will be used, install it. If using a winch, remove the hood (Section 11).
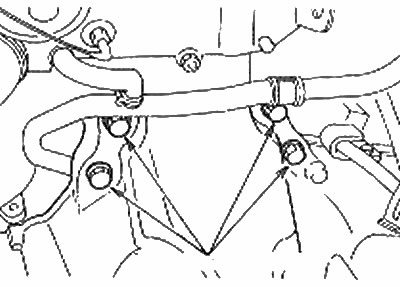
7. Remove the four upper bolts securing the transmission to the engine.

Location of transmission top bolts (arrows)
8. Jack up the front of the car, put it on axle stands and drain the transmission oil (Section 1).
9. Remove the front wheels and mudguards and disconnect the anti-roll bar links. Remove the skid plate (where installed).

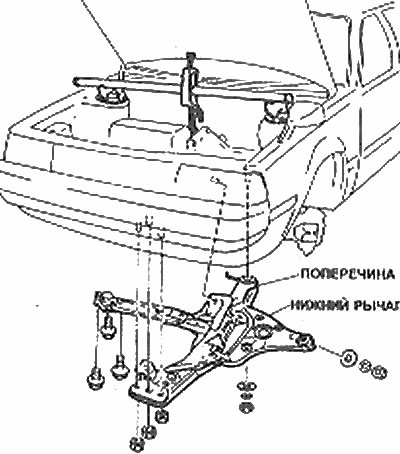
Mounting details of the crossmember assembly and the lower suspension arm
10. Remove the bolts securing the lower ball joints to the steering knuckles and separate the lower suspension arms from the knuckles (Section 10).
11. Disconnect the left drive shaft from the transmission (Section 8).
12. Remove the connecting shaft (Section 8). Insert a wooden pin or similar to secure the differential bevel gear.
13. Separate the driving rod from the shift rod and remove the rod from the transmission.
14. Remove the transmission bottom cover.
15. Unscrew and remove the cross member assembly and the left lower arm and suspension.
16. Support the transmission with a jack and attach it to it.
17. Remove the two remaining bolts, separate the transmission from the engine. Do not let the transmission hang on the input shaft. Lower the transmission while holding it so that it does not fall off the jack.

Remove the transmission using a frame, jack and rope
Installation
18. Apply a thin film of molybdenum grease to the transmission input shaft grooves.
19. Lift the transmission into place and install the bolts. Tighten the bolts with the tightening force specified in the Specifications.
20. Connect the extension rod to the transmission and the shift rod to the drive rod.
21. Install the lower arm and cross member assembly.
22. Install the lower transmission cover.
23. Install the connecting shaft (Section 8).
24. Install the left drive shaft (Section 8).
25. Connect the lower ball joints with the steering knuckles and install the nuts and bolts, clamping them with the tightening force regulated specifications.
26. Connect the anti-roll bars.
27. Install mudguards and front wheels. Install the skid plate (where applicable).
28. Install the starter.
29. Remove the jack from under the transmission and lower the vehicle to the ground.
30. Install four bolts mountstransmission to the engine. Tighten the bolt with the tightening force specified in the Specifications.
31. Install the wire harness brackets and the ground strap bolt. Connect the clutch cable.
32. Fill the transmission with the correct type of oil (Section 1).
