Raise the front of the vehicle and secure it on stands.
Remove the front wheel.

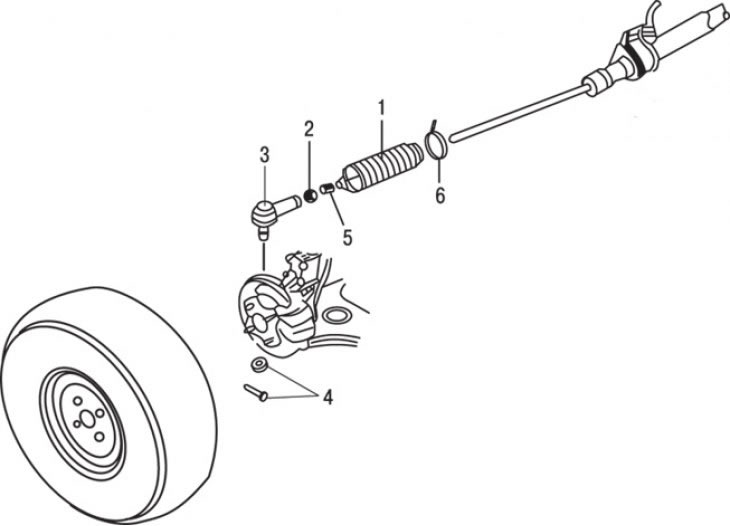
Pic. 11.15. Tie rod end and steering gear cover: 1 – a cover of the steering mechanism; 2 - locknut; 3 – a tip of steering draft; 4 - nut and cotter pin; 5 - outer collar; 6 - inner clamp
Remove the cotter pin and unscrew the nut securing the tie rod end ball joint to the steering knuckle a few turns (pic. 11.15). Using a puller, press the ball joint pin of the tie rod end out of the steering knuckle. Fully loosen the self-locking nut and remove the tie rod end ball joint pin from the steering knuckle.

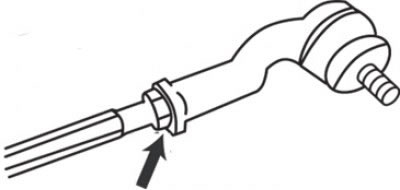
Pic. 11.16. Locknut position mark on tie rod thread
Mark the position of the lock nut on the tie rod threads in order to subsequently install the tie rod end in its original position (pic. 11.16).
Loosen the locknut on the tie rod a few turns.
Unscrew the tie rod end from the tie rod.

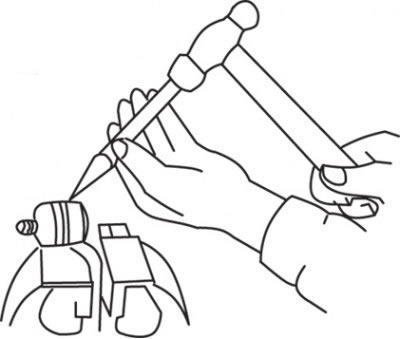
Pic. 11.17. Removing the boot from the tie rod end

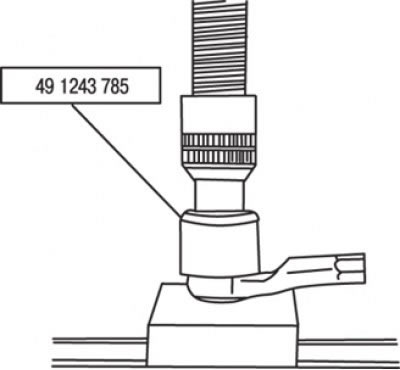
Pic. 11.18. Using special tool 491243785 to press in the tie rod end
Check the tie rod end boot for ruptures or lubricant leaks. To replace the boot, clamp the tie rod end in a vise and gently knock it down with a hammer and a flat chisel (pic. 11.17). Be careful not to damage the sealing surface. Apply some lithium-based lubricant to the new boot and install the boot to the tie rod end. Press the boot onto the tie rod end using an appropriately sized vise and mandrel or press and special tool 491243785 (pic. 11.18).
Rotate the locknut until it reaches the previously marked mark on the tie rod. Screw the tie rod end onto the tie rod until it contacts the lock nut.
Install the tie rod end ball joint trunnion into the steering knuckle. Screw the nut of fastening of the spherical joint of the tie rod end to the steering knuckle and tighten it to the required torque.
Tighten locknut.
Install the front wheel and lower the vehicle to the ground. Tighten the wheel nuts.
Check the front wheel alignment.
