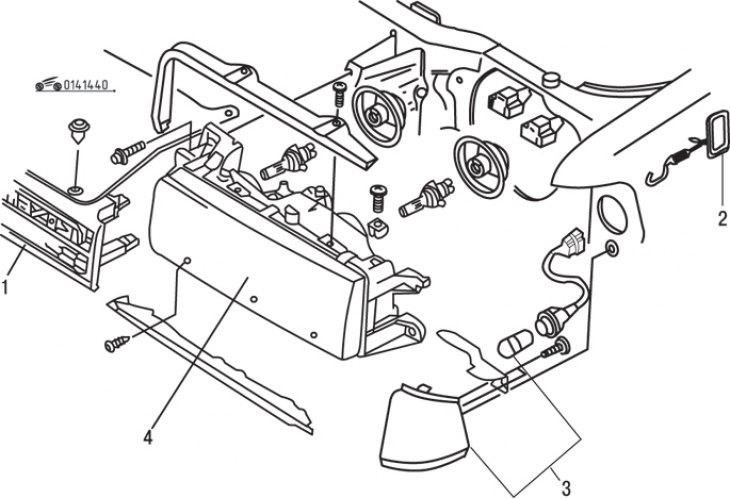
Pic. 14.40. Headlight of cars of later releases: 1 – facing of a radiator; 2 - spring; 3 - diffuser of the direction indicator and lamp; 4 - headlight
On later vehicles, the twin headlights on the sides of the grille are combined into one (pic. 14.40). Removal and installation of headlights is similar to removal and installation of headlights, given in sec. 13 «electrical equipment».
Lamp replacement
In the instrument cluster of cars of later years of production, lamps of two sizes are installed, however, the operations for replacing them are similar to the operations for replacing lamps, given in Sec. 13 «electrical equipment».
To replace the tail light bulb, open the rear door or trunk lid, remove the screws, remove the clips, and unscrew the carpet opposite the tail light.

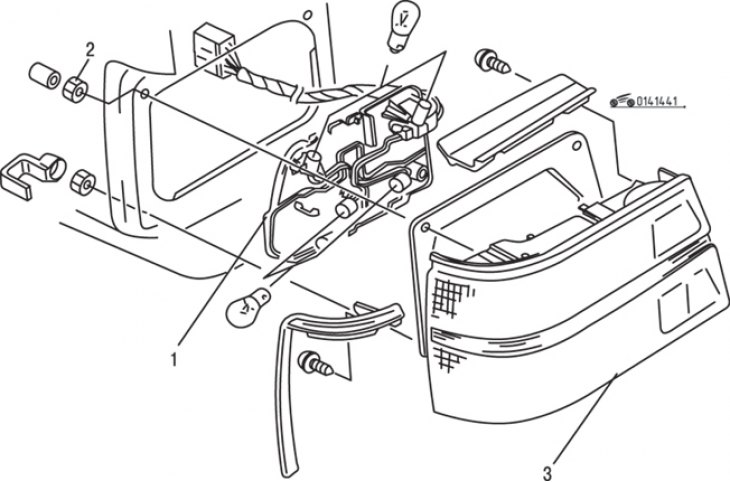
Pic. 14.41. Back light: 1 - block of lamps; 2 - diffuser fastening nut; 3 - diffuser
Remove the lamp unit, then remove the lamp from it by pushing it in and turning it counterclockwise (pic. 14.41). Installation is carried out in the reverse order of removal.
To replace the lamp that lights up when the door is opened, unscrew the screws, remove the diffuser and pull out the lamp. Install a new lamp, diffuser and screw in the screw.
To replace the rheostat illumination lamp, remove the rheostat and unscrew the lamp socket from the reverse side. Installing a new lamp is carried out in the reverse order of removal.
