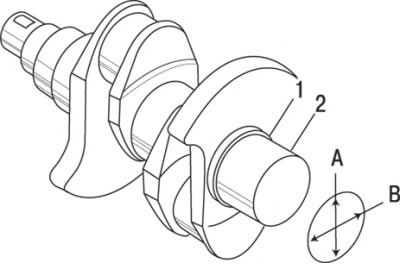
Pic. 3.45. Neck measurement (main and connecting rod) crankshaft at two points (1 and 2) and in two diametrically opposed positions (A and B)
Using a micrometer, measure the diameters of the main and connecting rod journals, compare the result with the values \u200b\u200bgiven in the technical data. Check the ovality of the main and connecting rod journals by measuring their diameter at several points along the circumference. Check the taper of the necks, for which measure the diameter of the neck in places near the counterweights (pic. 3.45); compare the results with the values given in the technical data. If a micrometer is not available, then measurements can be taken in workshops for a reasonable fee.
In the presence of damage, as well as if the ovality, taper and wear of the necks exceed the established maximum permissible values, the shaft should be handed over for regrinding to a specialized workshop. After repairing the shaft, it is necessary to replace the main and connecting rod bearings with repair ones.
