Attention! Old piston rings must always be replaced when disassembling the engine.
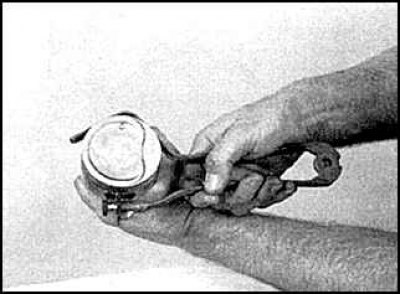
1. Carefully remove the rings from the piston using the special tool.
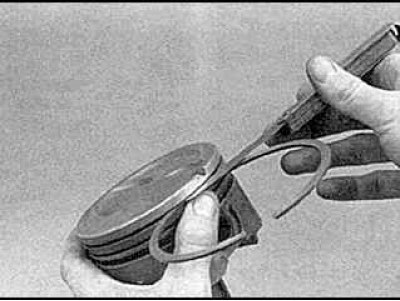
2. When removing the rings, do not damage the surfaces of the pistons. If a special tool is not available, then the rings can be removed using old feeler gauges or equivalent narrow metal strips. Carefully push the ring apart, insert the plates between the ring and the piston, remove the ring by moving it along the plates.
3. Repeat the operation with the rest of the rings, not allowing the bottom ring to fall into the groove located above. Since the rings are subject to mandatory replacement, their accidental breakage should not be paid attention to, but the experience gained when removing the rings will be very useful when installing new rings on the piston.
4. Scrape off the carbon from the bottom of the pistons. After removing the top coarse layer of carbon deposits, clean the piston crown with a brush or cloth-based sandpaper. Never use a wire brush mounted on a power drill to remove carbon deposits, as this can erode the soft alloy from which the pistons are cast.
 |  |
5. Using a special tool, remove carbon deposits from the piston ring grooves. If such a device is not available, you can use an old broken piston ring. Only remove carbon deposits, being careful not to remove piston material. Be careful not to damage the seating surfaces of the ring grooves. Beware of cuts, as the edges of a broken ring are sharp.
6. After removing carbon deposits, thoroughly wash the surfaces of the grooves of the rings with a solvent, dry thoroughly. Make sure the oil drain slots where the oil scraper ring is installed are clean.
7. If there are no signs of significant wear and if cylinder boring is not required, then the pistons should not be changed. Normal wear shows up in the form of traces of uniform vertical wear on the rubbing surface of the piston and in the form of a slight weakening of the fit of the upper compression ring. Replacing piston rings is a must.
8. Carefully check for cracks on the piston skirt, on the piston pin bosses and on the piston ring seats.
9. Check for chips and scoring on the rubbing area of the surface of the piston skirt, traces of burnout in the central part of the piston crown, as well as burning of its crown. If chips and scuffs are observed, then this indicates frequent overheating of the engine, one of the reasons for which may be abnormal combustion of the fuel mixture. In this case, a thorough check of the lubrication and cooling systems is required.
10. Burning in the bottom of the piston indicates the operation of the engine with an incorrect setting of the ignition timing. The cause of piston crown burning is usually abnormal combustion (detonation). If these flaws are found, then it is necessary to find their cause and eliminate it, otherwise serious damage is possible.
11. Piston corrosion in the form of notches indicates penetration into the combustion chamber (as well as in the crankcase) coolant. Here again it is required to find their cause and eliminate it, otherwise the repaired engine may fail.

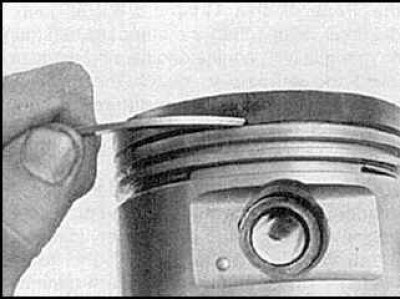
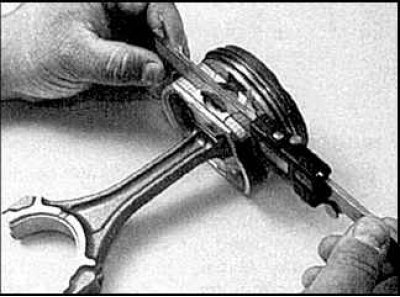
12. Measure the gap between the ring groove seat and the piston ring by inserting a new ring into the groove and passing a feeler gauge between the groove and the ring. Check the clearance in three or four places along the length of the entire groove.
13. Make sure this ring matches the groove you will be installing into, as different grooves vary in size. If the clearance exceeds the specified limit, the piston should be replaced.
14. Check the clearance between the piston and the cylinder by measuring the respective diameters. Make sure measurements are taken on a pair of mating parts.

15. Measure the piston diameter at the skirt. The clearance value is determined as the difference between the diameters of the cylinder and the piston skirt. If the gap exceeds the established limit, then the cylinder block must be bored, and the pistons and rings should be replaced with repair ones. (The clearance between the piston and the cylinder can also be measured, but with less accuracy, using a feeler gauge placed between the piston inserted in the cylinder and the cylinder).
16. Check the clearance between the piston pin and the connecting rod head by rocking the piston and connecting rod in opposite directions. A noticeable play will indicate an increased gap and the need to repair this connection. The piston assembly with the connecting rod must be handed over for repair to replace the piston pins, as well as to bore the connecting rod head and the hole in the piston to the repair dimensions.
17. If it is necessary to remove the pistons from the connecting rods to replace the pistons, or to eliminate the play of the piston pin, then they must be handed over to a car service workshop. At the same time, it will be necessary to check the bending and twisting of the connecting rods, for which the workshops have the necessary equipment. If the installation of new pistons or connecting rods is required, the pistons should not be disconnected from the connecting rods.
18. Check the connecting rods for cracks or other damage. Remove the connecting rod bearing caps at this stage, remove the bearings, wipe the bearing seating surfaces on the connecting rod cap and on the connecting rod, and check for cracks, scratches, or nicks. After checking, assemble the connecting rod, installing the bearings in place, and tighten the nuts by hand.
