Attention! The dust generated by worn brake pads may contain asbestos, which is hazardous to your health. Do not blow out the brakes with compressed air or inhale this dust. Under no circumstances clean the components of the brake system with petroleum-based solvents. Use only brake cleaner.
Removing
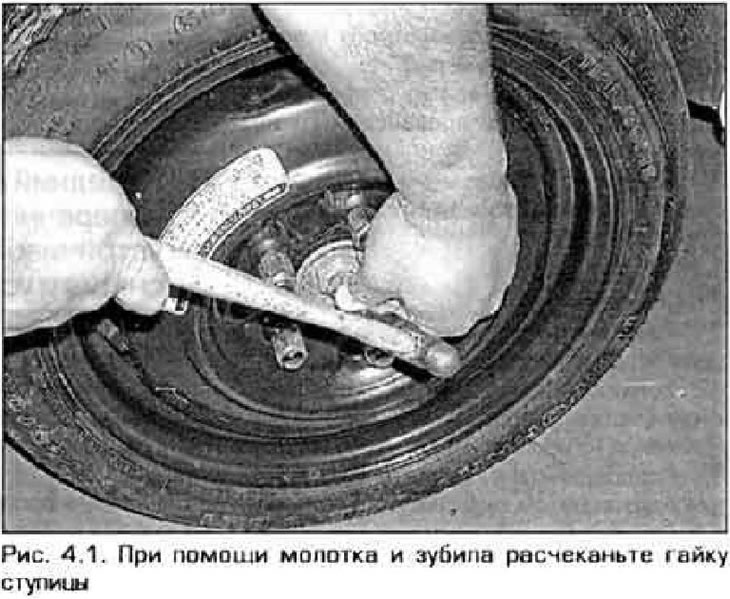
1. Clean the cap and knock out the hub nut with a hammer and chisel (pic. 4.1).

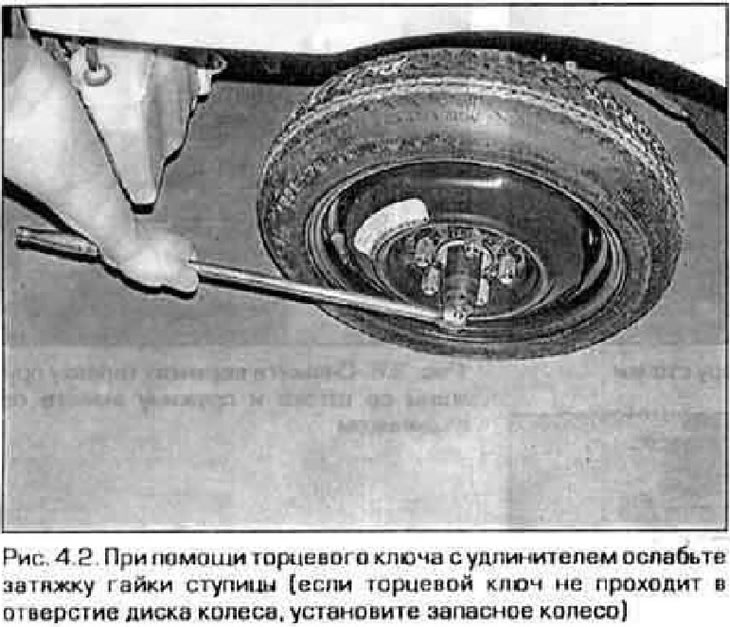
2. Use a socket wrench to loosen the hub nut (pic. 4.2).
Note. If the thorium wrench does not go through the wheel rim hole, install the spare wheel and lower the vehicle.

3. Loosen the wheel nuts, raise the vehicle and place it on supports. Remove the wheel and remove the hub nut.
4. Disconnect the brake hose from the rack (see fig. 2.2), then remove the caliper, caliper bracket and brake disc (see chapter 9).
Note. Do not disconnect the brake hose from the caliper. Secure the caliper with a piece of wire so that the brake hose is not pulled.
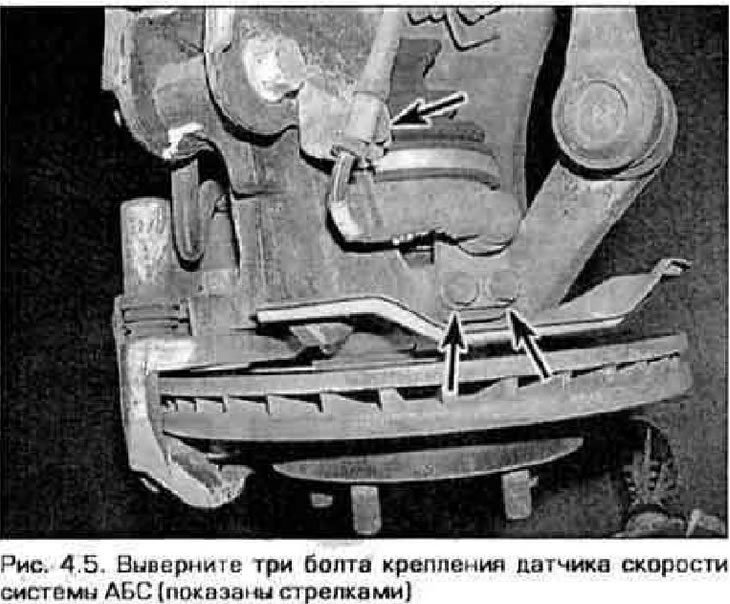
5. If the car has an anti-lock system, remove the bolts and remove the speed sensor (pic. 4.5).

6. Turn away nuts of fastening of a rack to a rotary fist, but do not take out bolts (see paragraph 2).
7. Disconnect the tie rod end from the steering knuckle arm (see paragraph 16).
8. Disconnect the ball joint from the steering knuckle (see paragraph 7).
9. Remove the drive shaft from the hub (see chapter 8). Tie the horses of the drive shaft with wire.
10. Take out bolts of fastening of a rotary fist to a rack and disconnect a rotary fist from a rack.
Installation
11. Expand the steering knuckle with the hub and insert the drive shaft into the hub.
12. Establish a rotary fist on a rack flange, insert bolts and screw nuts of fastening, but do not tighten them.
13. Connect the ball joint to the steering knuckle (see paragraph 7).
14. Connect the tie rod to the steering knuckle arm (see paragraph 16). Tighten nuts of fastening of a rotary fist to a rack the demanded moment.
15. Install the brake disc, caliper bracket and caliper (see chapter 9). Tighten the bracket and caliper mounting bolts to the required torque (see Technical Data at the beginning of Chapter 9).
16. Tighten the hub nut on the drive shaft securely, but not completely.
17. Establish a wheel and screw nuts of its fastening. Lower the vehicle and tighten the wheel nuts to the required torque (see technical data at the beginning of chapter 1). Tighten the hub nut to the required torque.
