Attention! The models described in this manual are equipped with airbags. When working in the cushion area, always turn them off (see chapter 12) to avoid accidental operation that could result in injury.
Removal and installation
1. Disconnect the negative cable from the battery.
Caution: If your car's audio system is equipped with an anti-theft protection, make sure you know the unlock code before disconnecting the battery.
2. On the Probe model, remove the center console (see chapter 11). Remove the side trim panel under the front panel on the passenger side (see chapter 11).
3. Remove the lining of the central part of the front panel (see chapter 11).
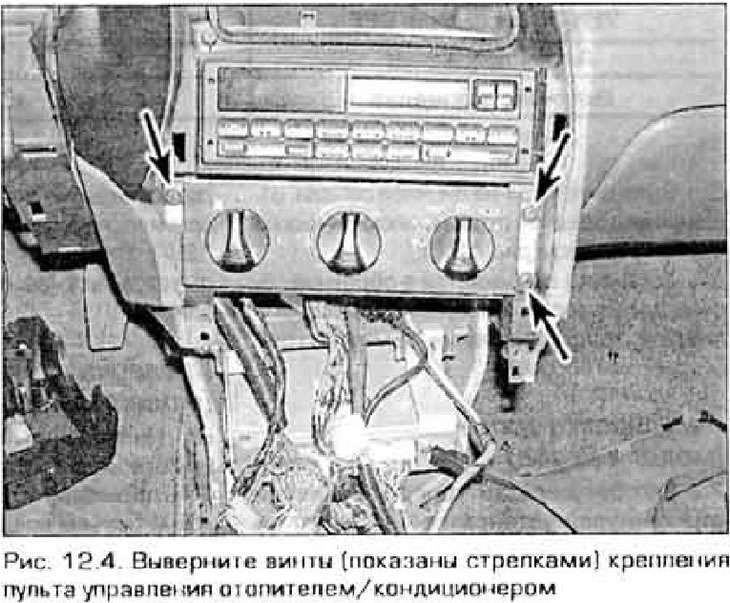
4. Remove the screws that secure the control panel (pic. 12.4).
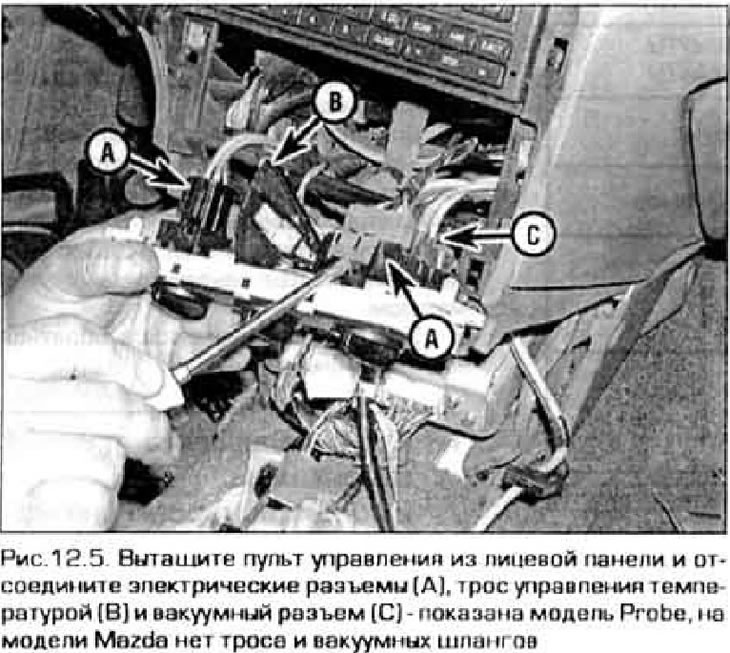
5. Pull the console out of the front panel, disconnect the electrical connectors and cables from the back side (pic. 12.5).
6. Installation is carried out in reverse order. On the Probe, adjust the temperature control cable as follows.
Cable adjustment (Probe models)
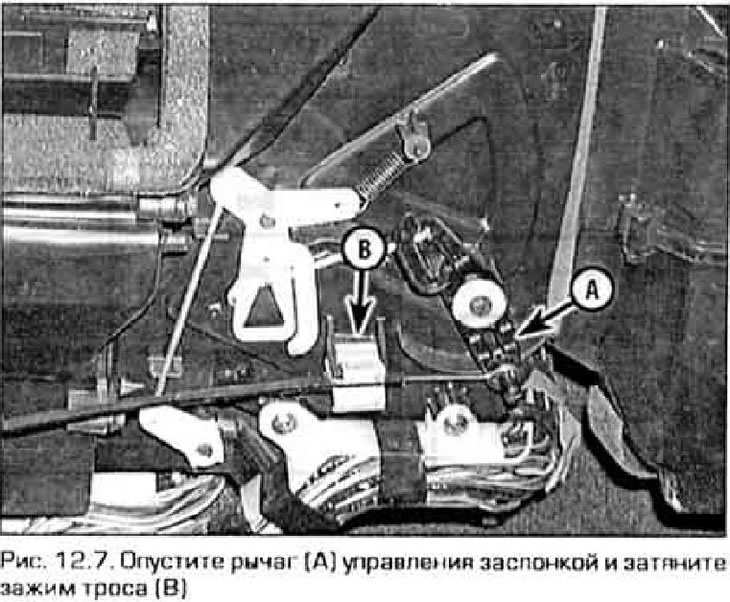
7. To adjust the temperature control cable, set the knob on the remote control to the highest temperature position. Under the front panel, fold back the carpet to access the throttle control lever on the other end of the cable (pic. 12.7). Release the cable clamp, lower the lever to the down position and tighten the clamp.
Checking electrical circuits (Mazda models)
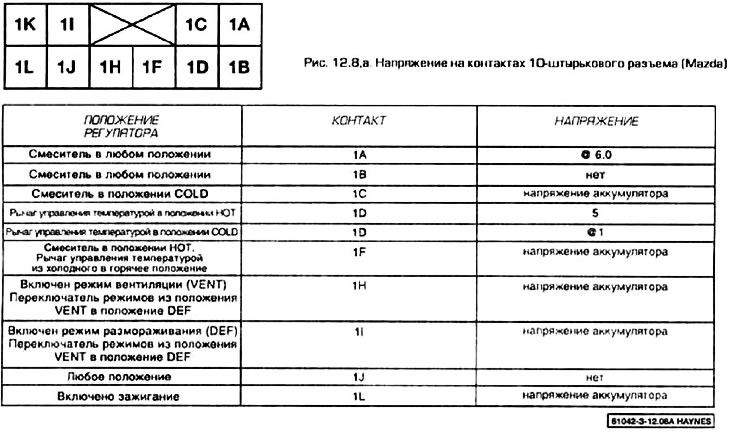
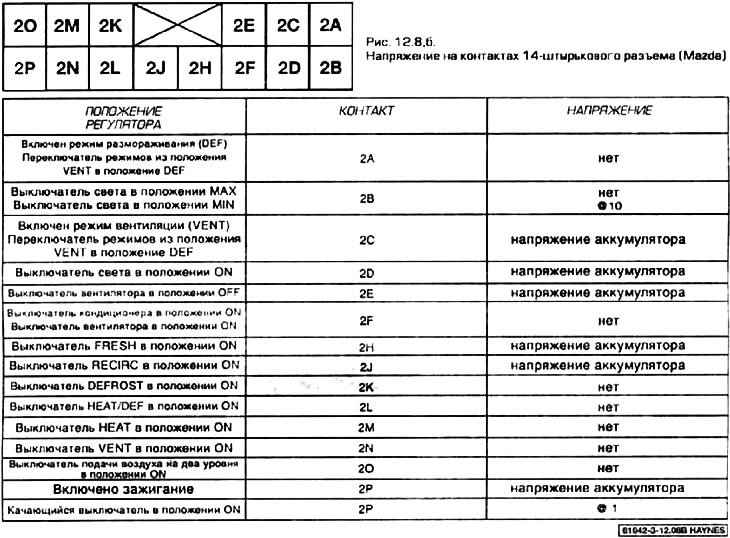
8. On Mazda models, the remote control has three connectors on the back: 10-pin, 14-pin and 6-pin. The 6-pin connector is for the fan speed switch (he was mentioned in paragraph 10). You don't have to unplug the connectors for testing: use suitable probes to get to the pins on the back of the connector. The voltage on the contacts must correspond to that indicated in the table in fig. 12.8,a,6.
