Removal and installation
Note: Installation is in the reverse order of removal.
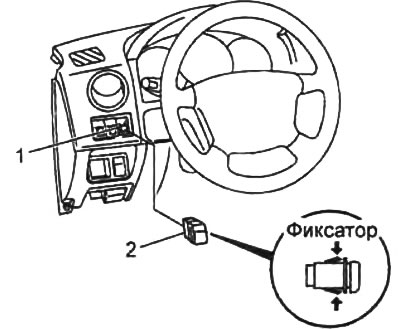
1. Remove the bottom trim on the driver's side.
2. Pressing on the latches, remove the switch and disconnect the connector.

1 - connector,
2 - front axle switch.
Examination
1. Remove the front axle switch.
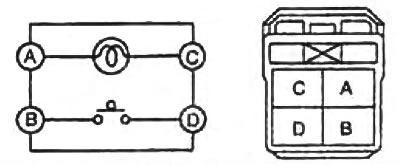
2. Make sure there is continuity between the terminals "IN" And "D" switch when the switch is pressed and no conduction when the switch is not pressed.

3. Check for continuity between the leads "A" And "WITH" in any position of the switch.
If necessary, replace the front axle switch.
