Removal and installation of a transmission.
1 - handles of control levers for the gearbox and transfer case,
2 - finishing panel of levers,
3 - anther,
4 - fixing plate,
5 - cover,
6 - anther,
7 - gasket,
8 - washer,
9 - bushing,
10 - gearbox control lever,
11 - transfer case control lever,
12 - lever saddle,
13 - clutch cylinder,
14 - lower protective transfer case,
15 - switch on sensor,
16 - reversing light switch connector,
17 - connector for the all-wheel drive enable sensor,
18 - connector for the sensor for switching on the neutral gear of the transfer case,
19 - speed sensor connector,
20 - transverse beam,
21 - gearbox assembly,
22 - gearbox support,
23 - bracket,
24 - the upper part of the support,
25 - rubber spacer,
26 - the lower part of the support.
2. Drain the gearbox oil (see chapter "Maintenance and general inspection and adjustment procedures").
3. Remove the front and rear driveshafts (see chapter "cardan shaft").
4. Remove the downpipe and catalytic converter of the exhaust system (see chapter "Air intake and exhaust system").
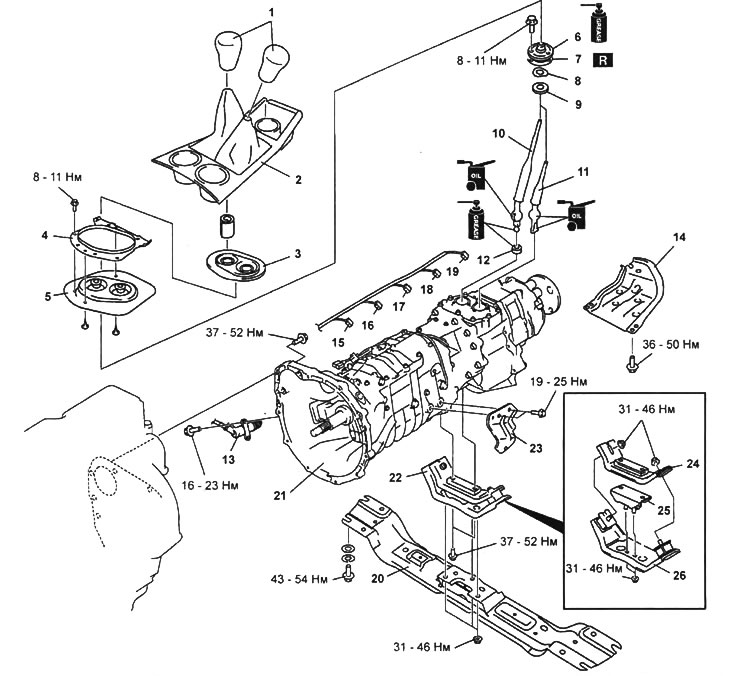
5. Remove the parts in the order they are numbered on the assembly drawing "Removal and installation of a transmission".
6. Install in the reverse order of removal.
Note: After installing the gearbox and transfer case, make sure that:
- no noise when shifting gears;
- smoothness of the gear;
- the absence of spontaneous shutdown of the transmission;
- correct operation of the reversing light switch.
Removal/Installation Notes
Note: two jacks are required to remove/install the gearbox.
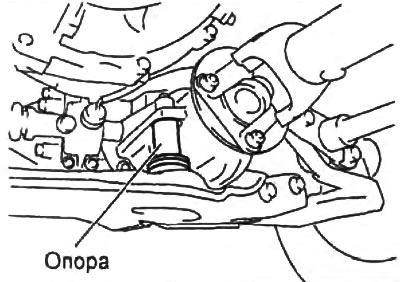
1. Remove the front gearbox support.

2. Jack up the transfer case.

3. Remove the cross beam.
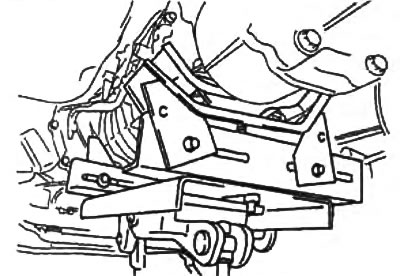
4. Using a second jack, jack up the gearbox.

5. When removing/installing the transmission, use jack stands to prevent the transmission from tilting to the right or left.
Note: Install the jack so that it does not interfere with the gearbox support bolts.
6. Turn away bolts of fastening of a transmission.
Note: Before removing the gearbox, make sure that all connectors, wires or tubes are disconnected from the gearbox. Otherwise, when removing the gearbox, they may be damaged.
